As a digital shooter, editing is a big part of my life! Luckily for me, I really enjoy it. I have recently been getting a lot of questions about my editing style – what presets I use, how I get skin tones to look natural, how to achieve the bright and airy feel, etc. – so I thought creating a blog post that covered editing techniques and tips would be useful to new photographers or photographers who love the light and bright look but haven’t yet settled on a consistent editing style. But I quickly realized that although I do make tweaks to my photos in post, I work really hard to get the image that I want in-camera while I’m shooting – i.e., correct exposure, white balance, sun position, etc. So after all of this time thinking over what I could share with you all, I found myself struggling to give away all of these secrets to how I edit because honestly it’s more about how I shoot. The editing is a necessary step to finishing my vision, but it’s actually just the cherry on top of the sundae.
So instead I’ve created a post that speaks about my process in creating a light and airy look, which includes an editing element. I’ll discuss what I find valuable prior to editing, my thoughts on presets, a basic outline for starting your own editing journey in Lightroom, and finally, a few before and after examples to show you how much (or little) editing work I actually do.
My hope is that this post will shed some light on how I approach editing, but even more so, a look at what goes into how I create photographs before I start editing! And please remember that all of the following information are my personal opinions and preferences, and while they work for me, they may not work exactly the same for you!
BEFORE EDITING BEGINS
Before I talk about my editing techniques I think that it’s important to mention that my photos look the way they do largely due to how I actually shoot the image. My camera settings, how I work with my white balance, the equipment I use, how I position my subjects in relation to the sun, and the lighting I look for are just some of what goes into creating the look and feel of my photographs. So while editing plays an important role in achieving a certain aesthetic, I want to stress that it cannot do all of the work for you and it will not fix an image that is not already on it’s way to looking the way you want it to.
My biggest and best piece of advice for editing starts well before the post processing even begins – shooting in RAW! When you shoot an image in the RAW format, as opposed to JPEG, you are giving yourself more control over the future editing possibilities because you are getting an unprocessed file that has all of the details/information that was available to your camera sensor saved. For anyone who is not familiar with RAW, be aware that this format is special and can only be read on a computer using very specific software, such as Adobe Lightroom. JPEG files are processed in the camera and therefore loose a lot of the initial detail that was present in an image and can only be altered so much. Therefore, in my opinion, RAW files are more ideal than JPEG for event photography and portraits because they are more forgiving if your settings were slightly off or you didn’t have time to adjust to a new lighting situation on a fast paced wedding day. But if you are new to photography and don’t have the software to handle RAW files then stick with JPEG until you do!
CAMERA SETTINGS
I shoot fully manual all of the time, which means I have full control over how my camera creates an image. This also clearly means that my camera will not automatically change settings for me when I need it to. I am responsible for picking my ISO, shutter speed, and aperture to then create the image that I see in my mind. But even with manual control there are plenty of situations where I didn’t hit the nail on the head with my settings but because I’m shooting RAW and I have my aperture where I want it I can later fix those problems when I go to edit and not loose my style in the process. So remember there are certain aspects to an image that you can only create in-camera (like a very shallow depth of field) and then there are things you can fix later (exposure and coloring).
Here are a few insights into my camera settings:
PRESETS
Myth: If I buy my favorite photographer’s presets my photos will instantly look amazing, no matter what.
No preset is simply the magic answer to your problems! And slapping on your favorite preset will not automatically guarantee that your images are going to look perfect – or how you imagined they would. You will need to tweak the settings after a preset is applied to achieve an awesome looking end result. Keep in mind that when presets are created by an individual or a company they are generally made to work with that person’s shooting style and aesthetic. And as much as you adore a particular person’s style, simply using the same preset will not guarantee that your work will look just like theirs. But that’s okay! Make your work your own. Use presets if you want and experiment with them until you create a style that is uniquely yours.
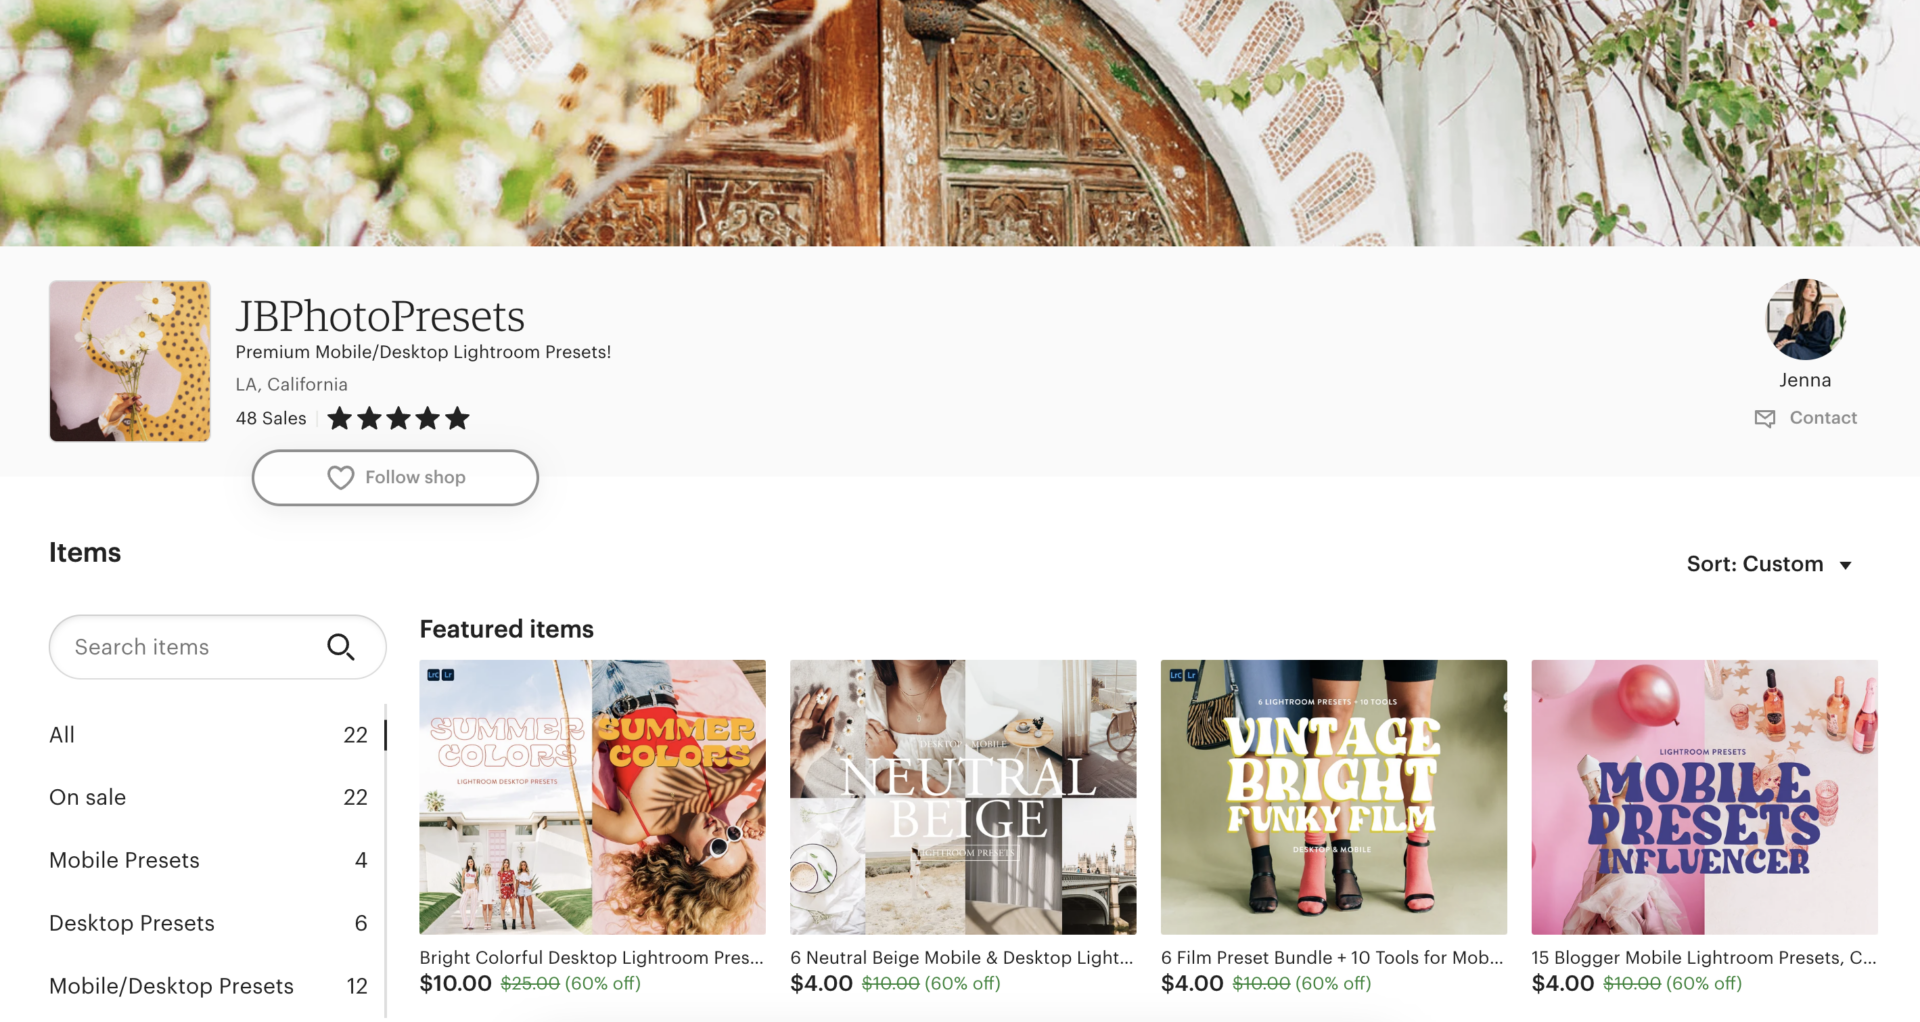
My preferred preset: JBPhotoPresets
It has been a long time coming, but I am so happy to finally announce the release of my very own Lightroom Presets for wedding photographers! I have been asked many times over the years if I would be willing to sell my presets and it never felt like the right time because I knew the product would need to be really great in order for me to feel good about selling it. So over the winter I spent a lot of time tweaking my presets and thoughtfully coming up with two bundles that I think can really be helpful to all different types of photographers, but specifically to natural light photographers who aim to have a slightly lighter and brighter aesthetic.
Check out this post to get a bit more information or you can go directly to my new SHOP page to buy!
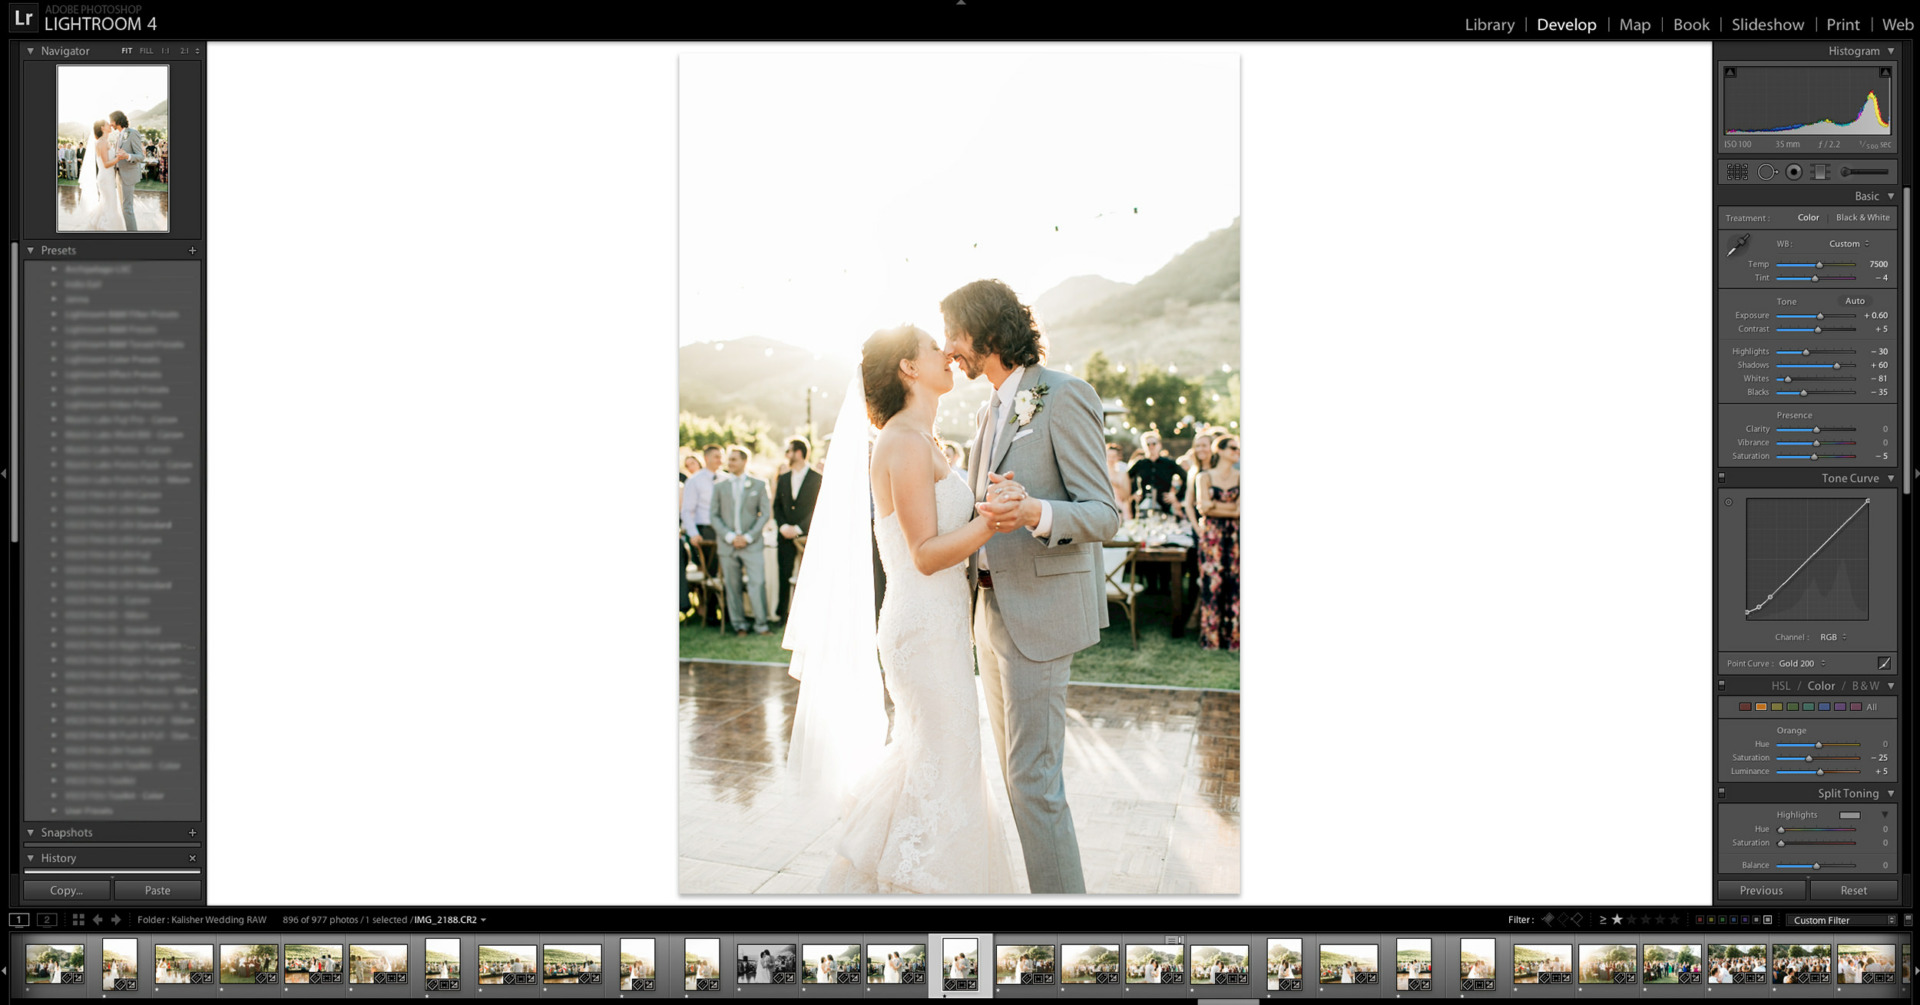
BASIC STEP-BY-STEP EDITING
You have an untouched image sitting in Lightroom ready to go. Now what?
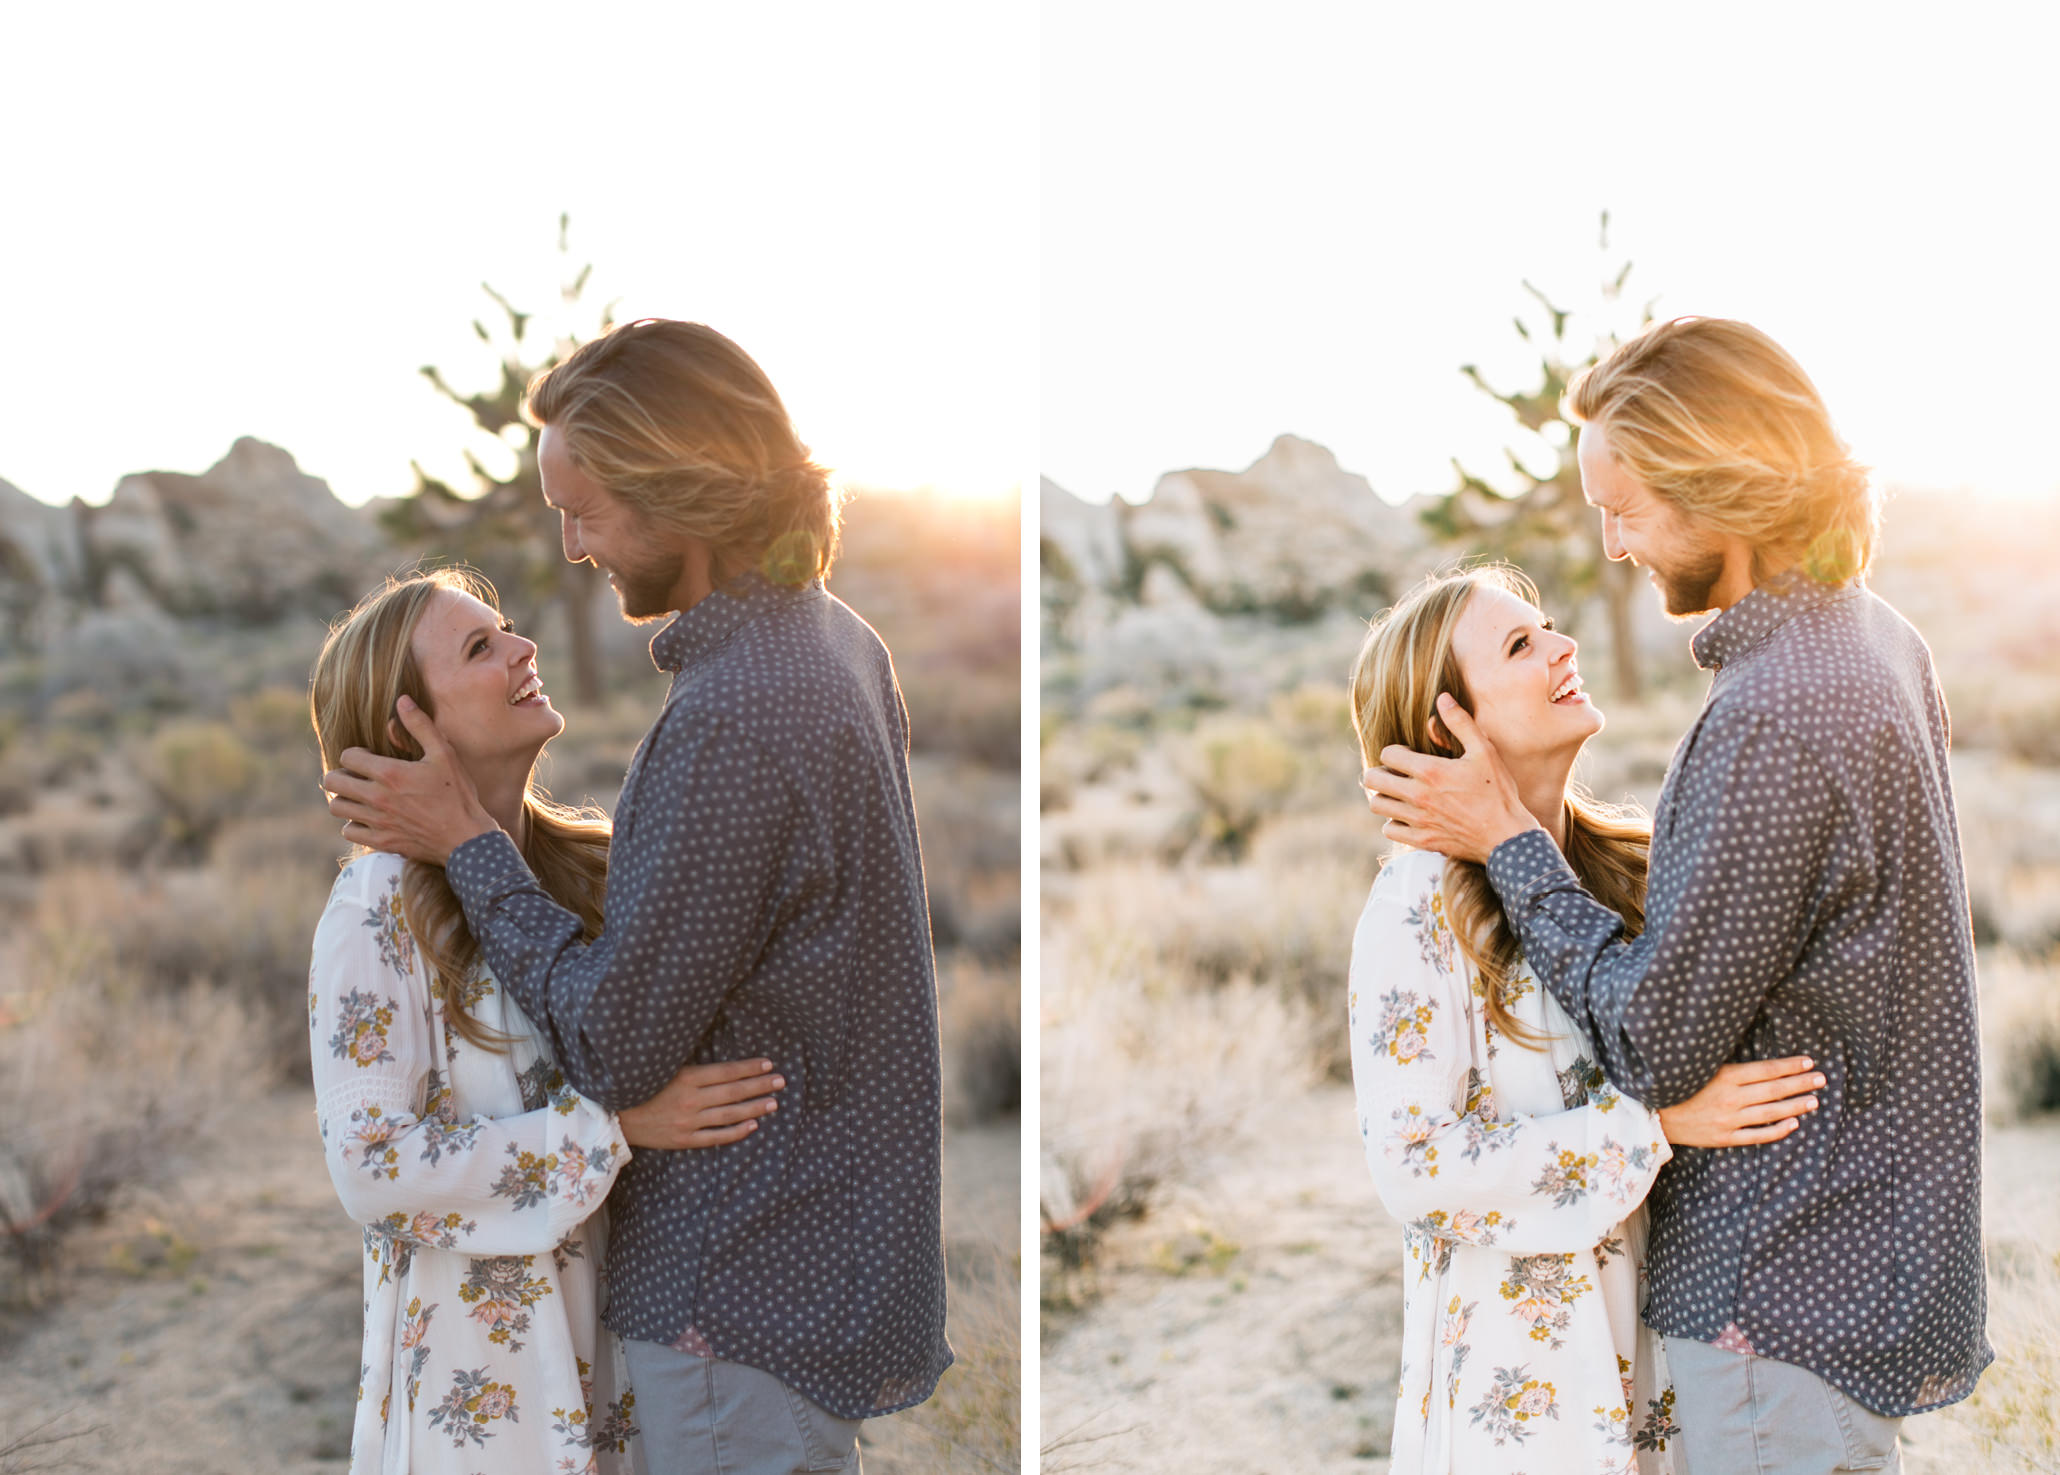
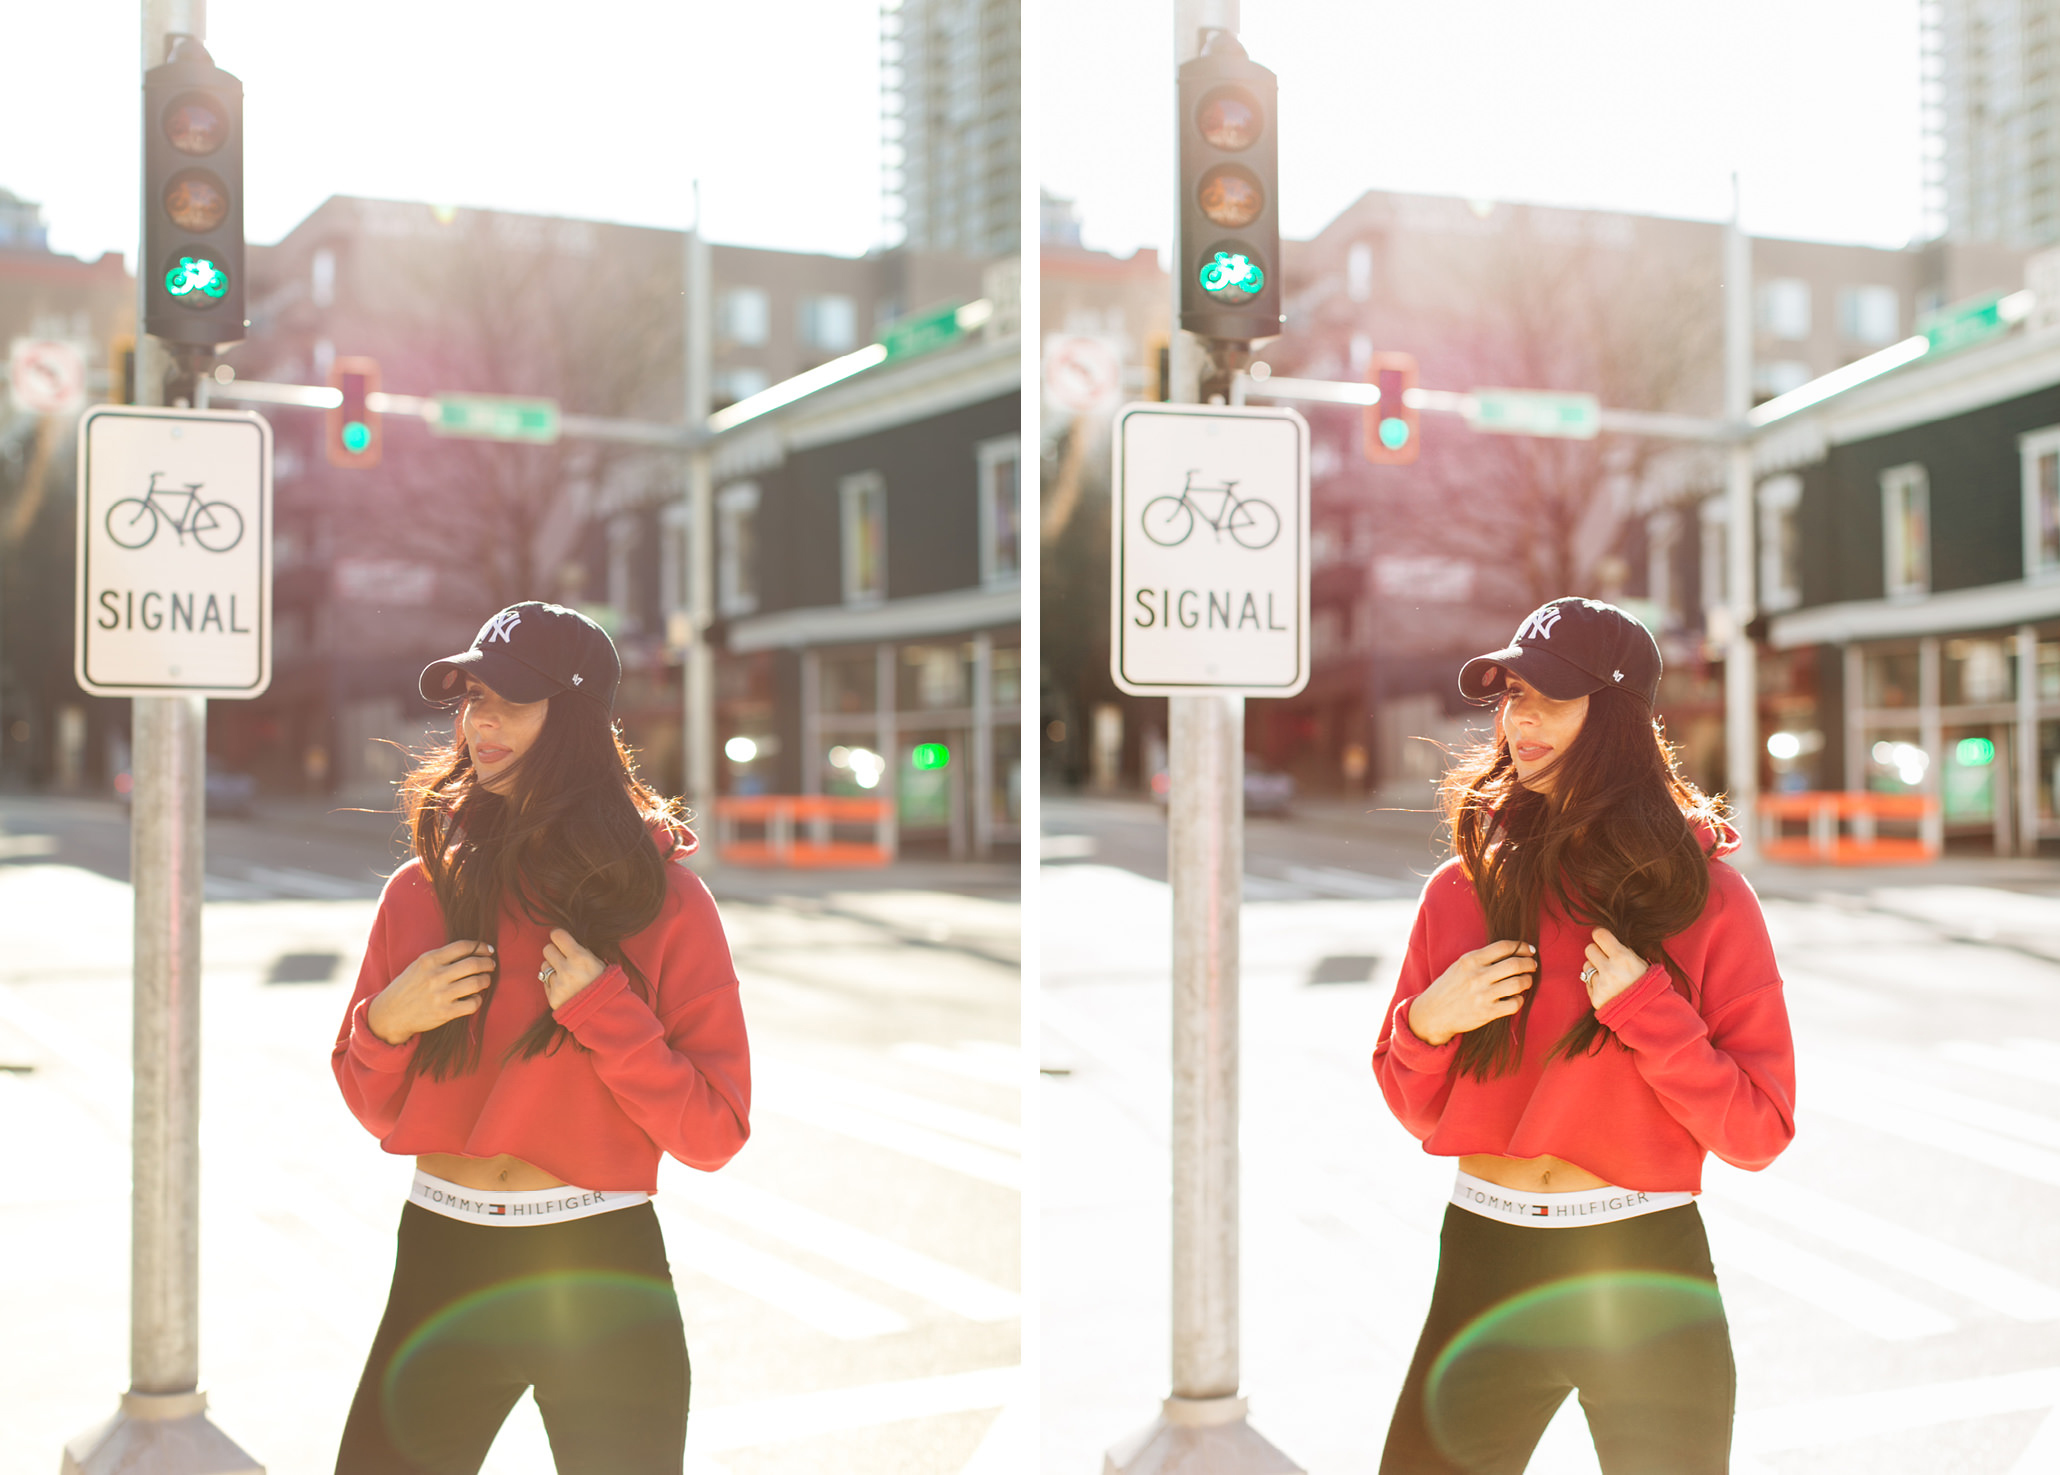
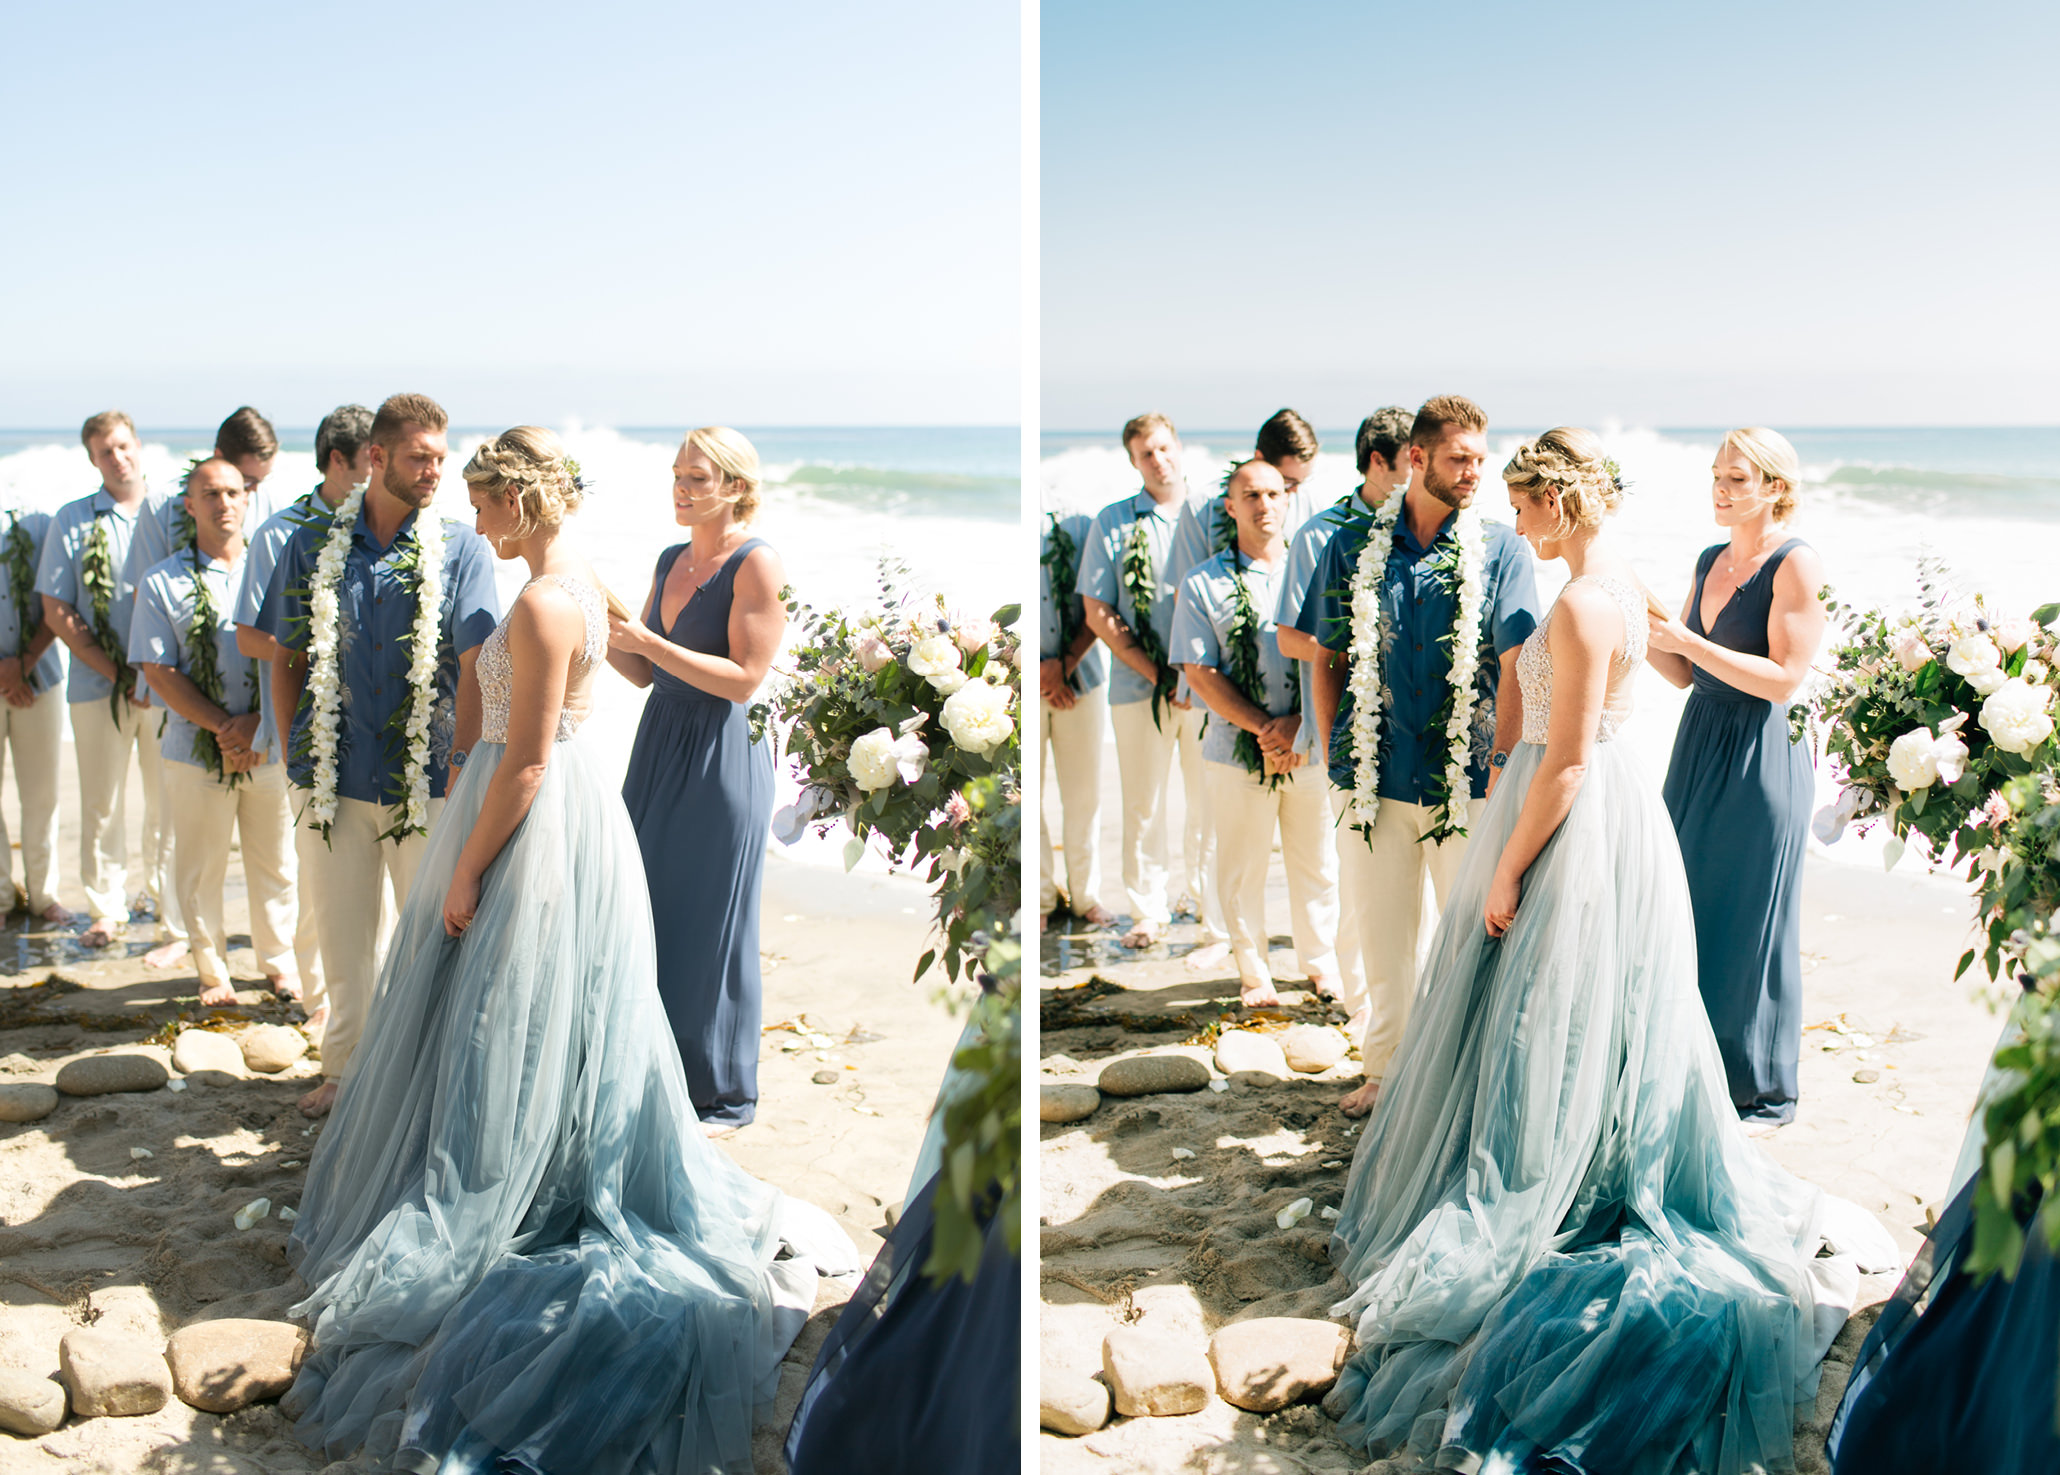
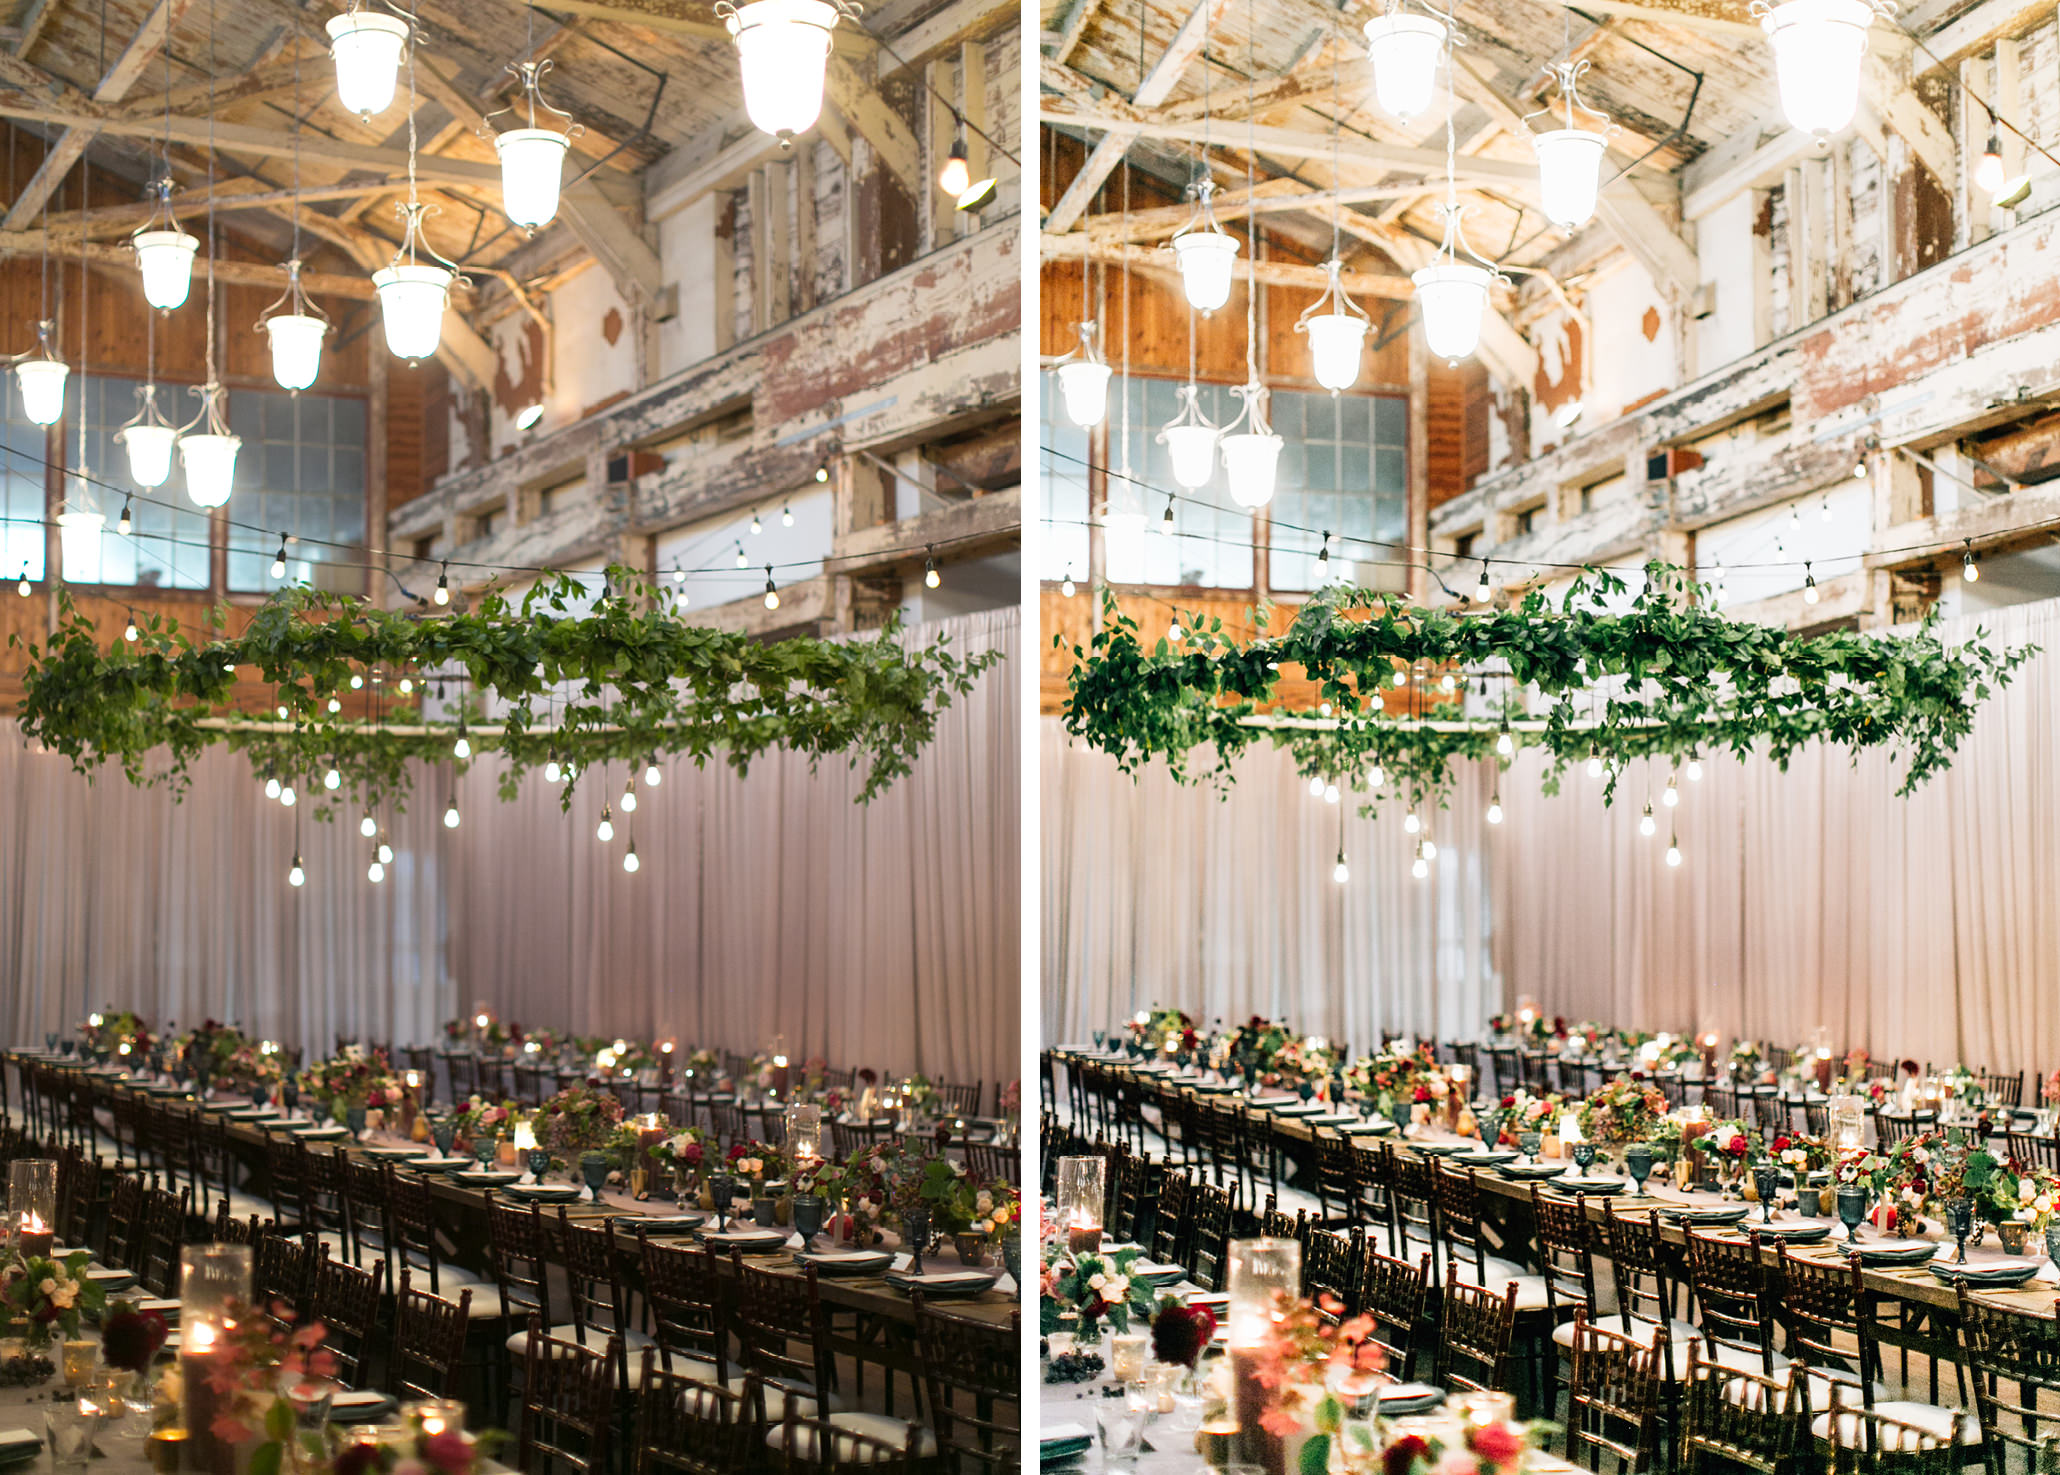
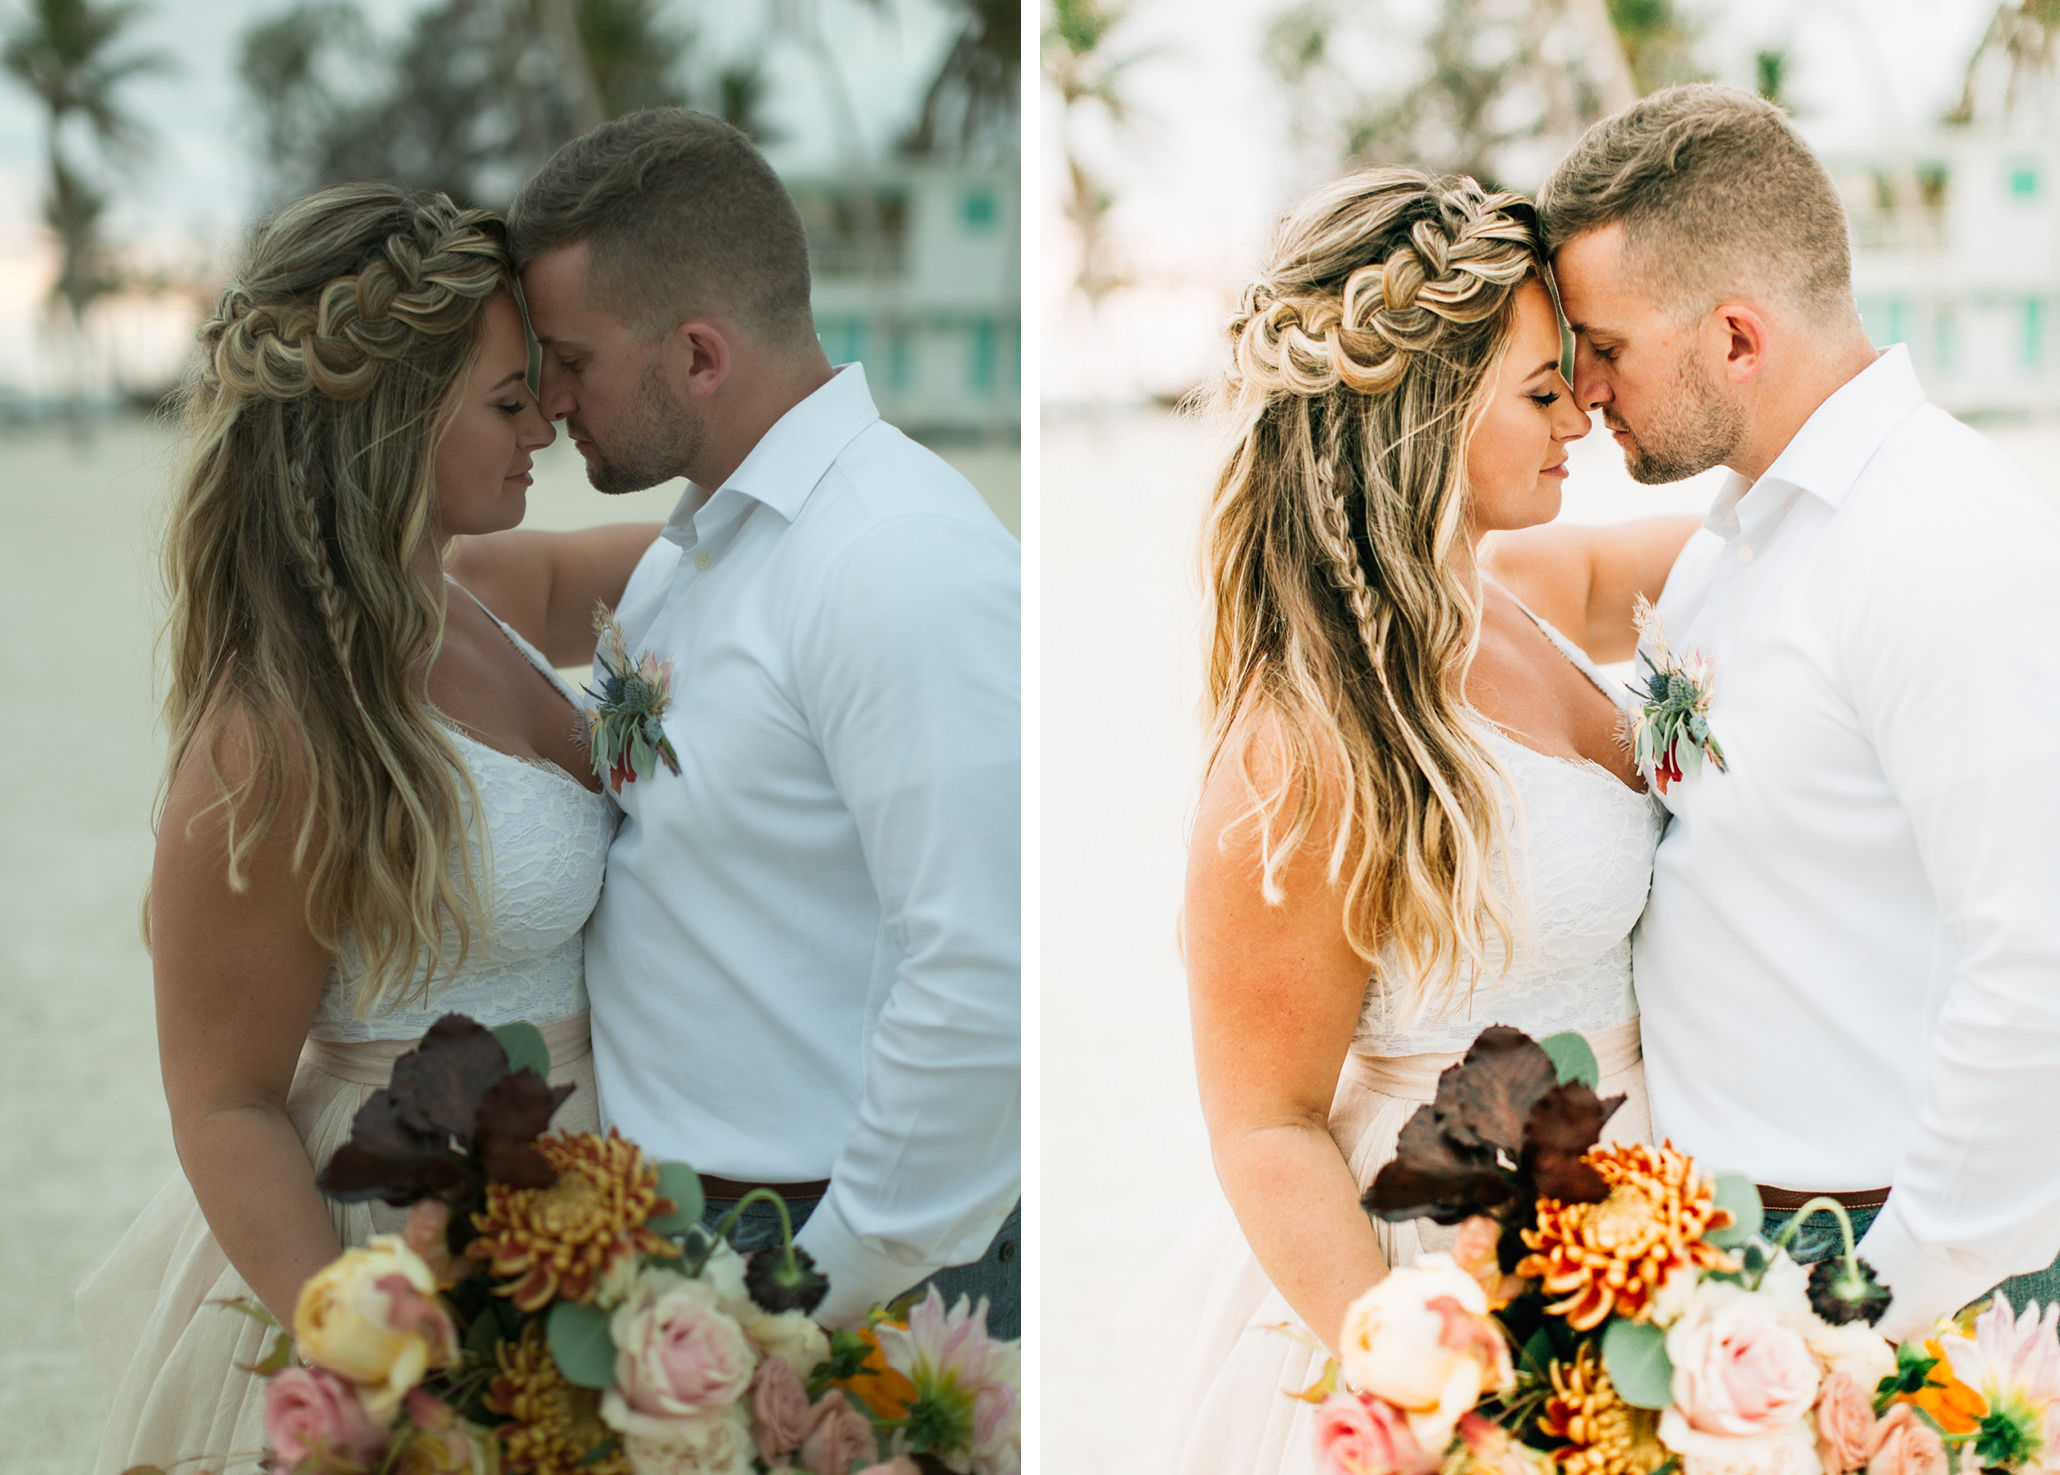
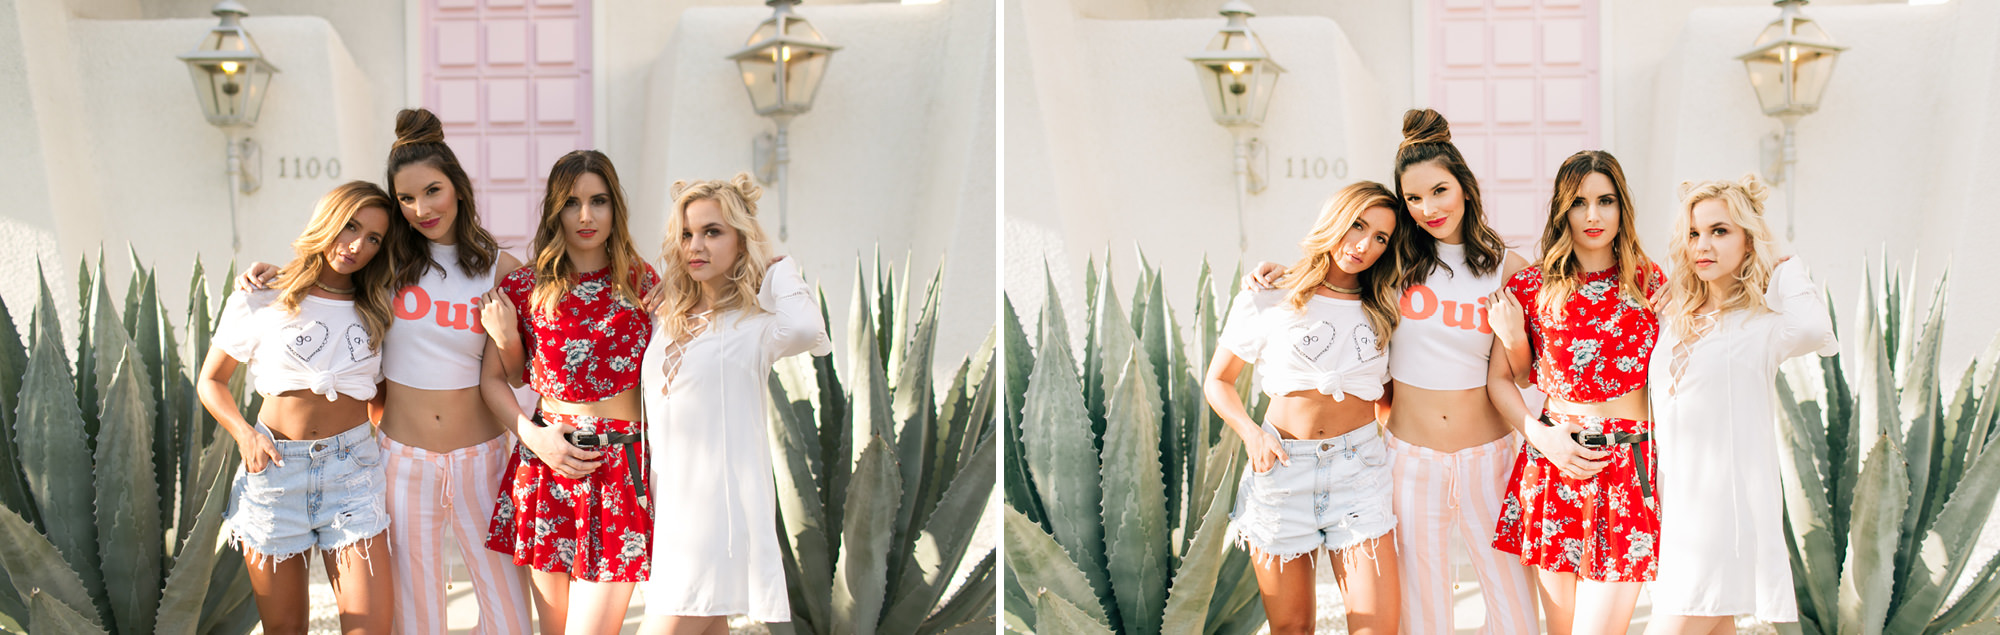
BEFORE/AFTER EXAMPLES
Editing is 100% more fun and can be enjoyable when you’re enhancing your photos and not trying to salvage them.
My ultimate goal is not only to capture important moments, beautiful details, and stunning portraits, but to also create an aesthetic within my work that is consistent across various settings, subjects, and lighting situations. Regardless of the time of day I will always bump up my exposure during post processing and typically alter the oranges, yellows, and greens using the HSL panel.


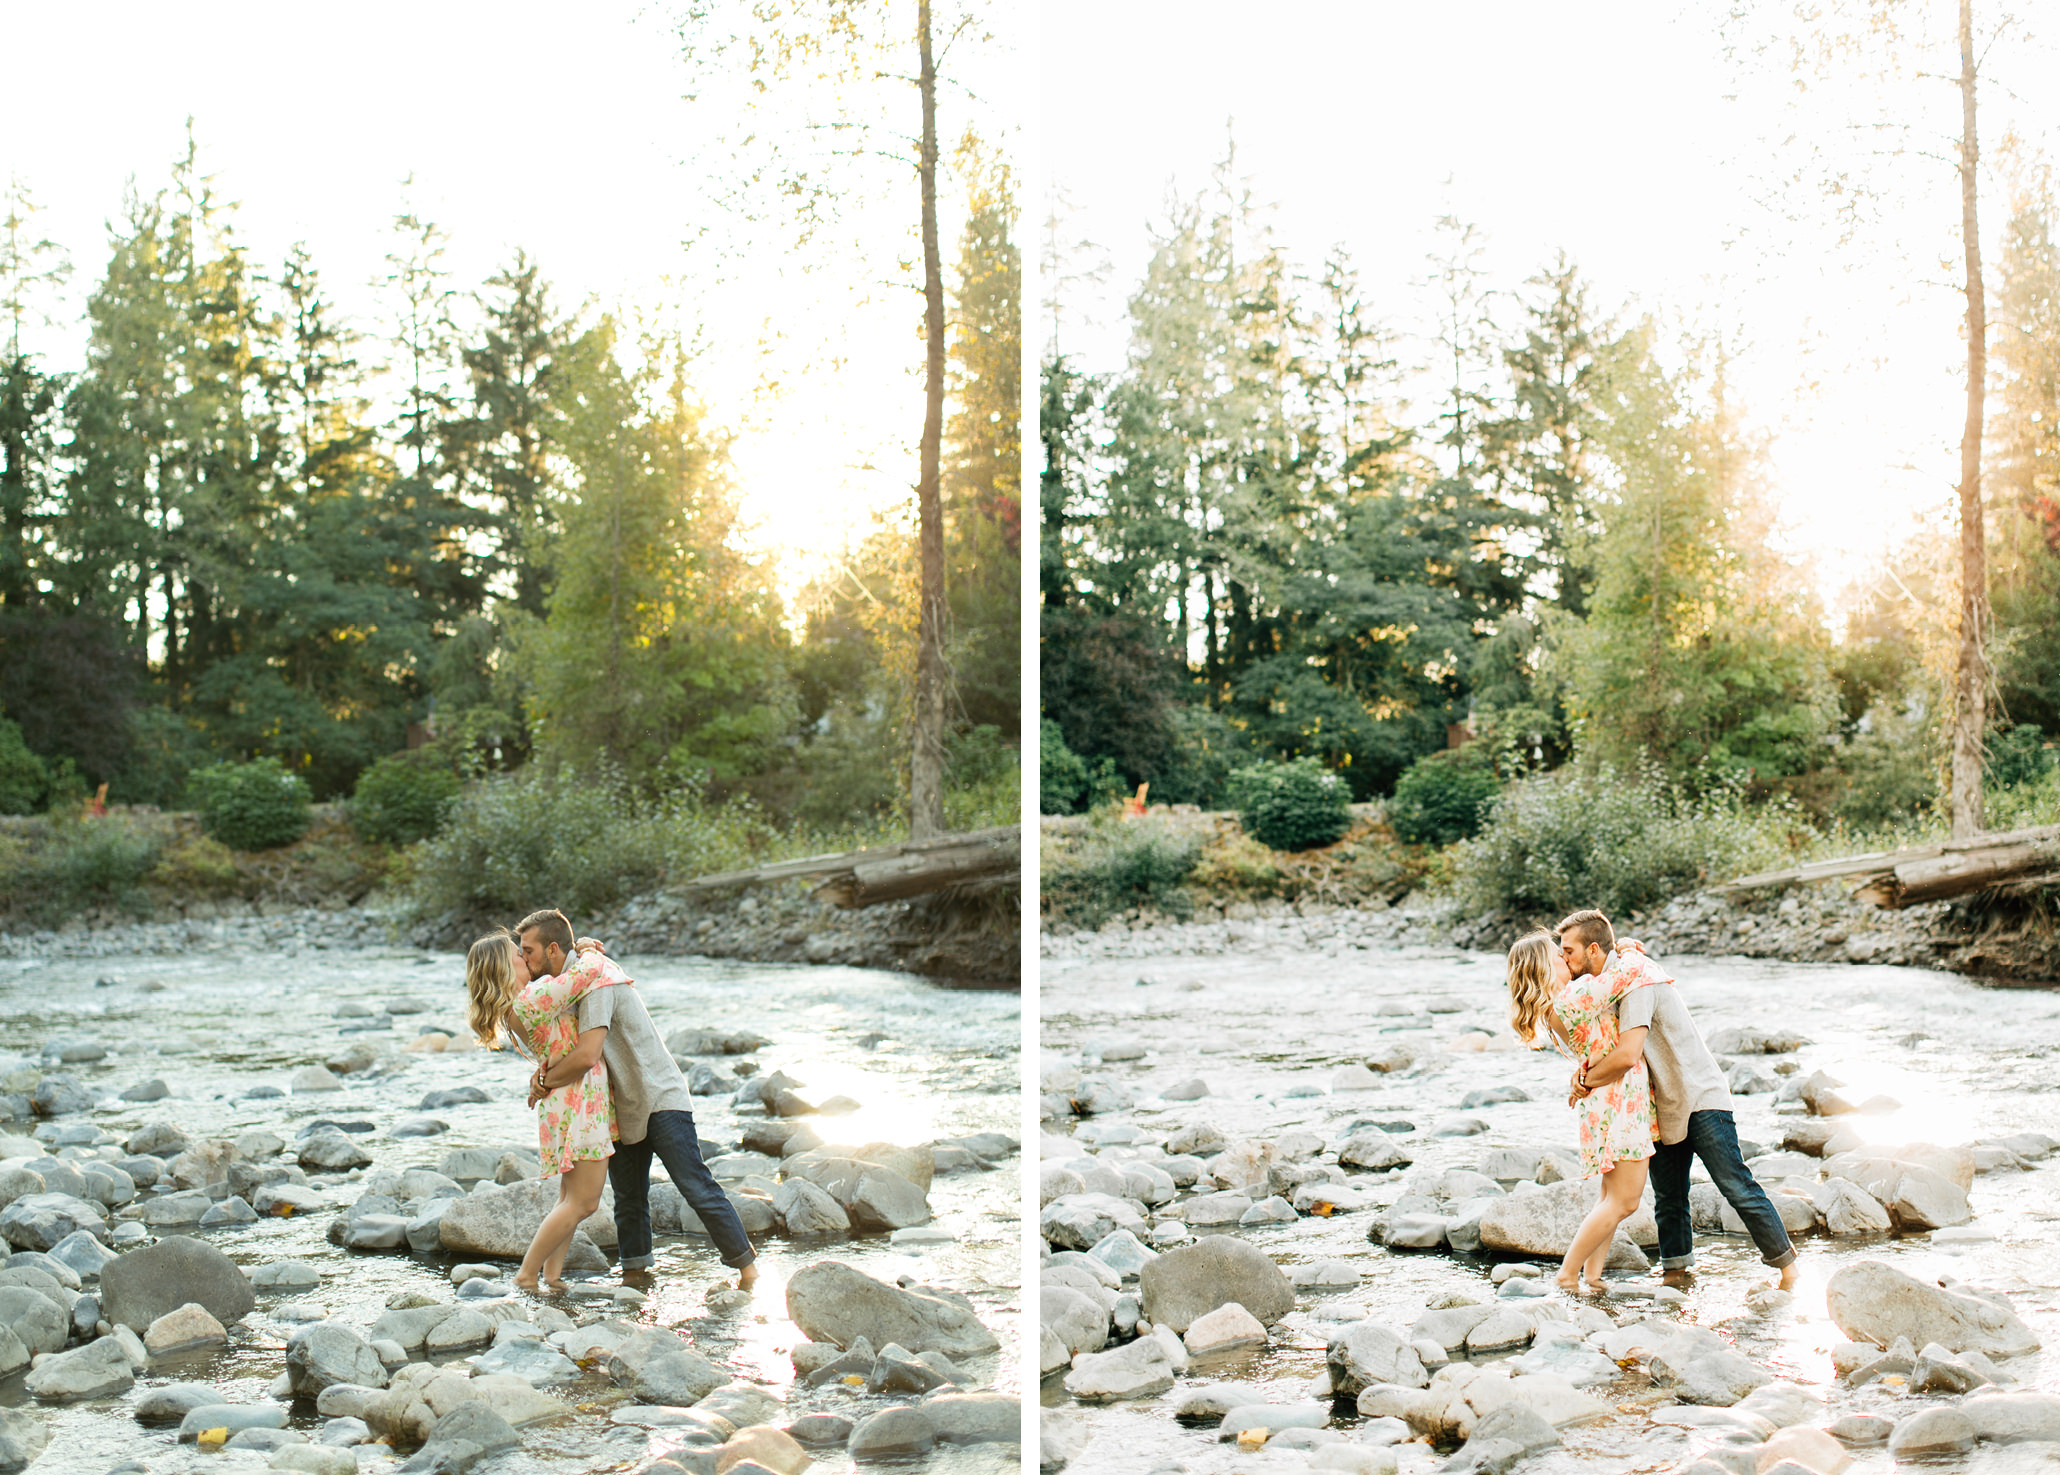
LIGHTING
Lighting is everything!
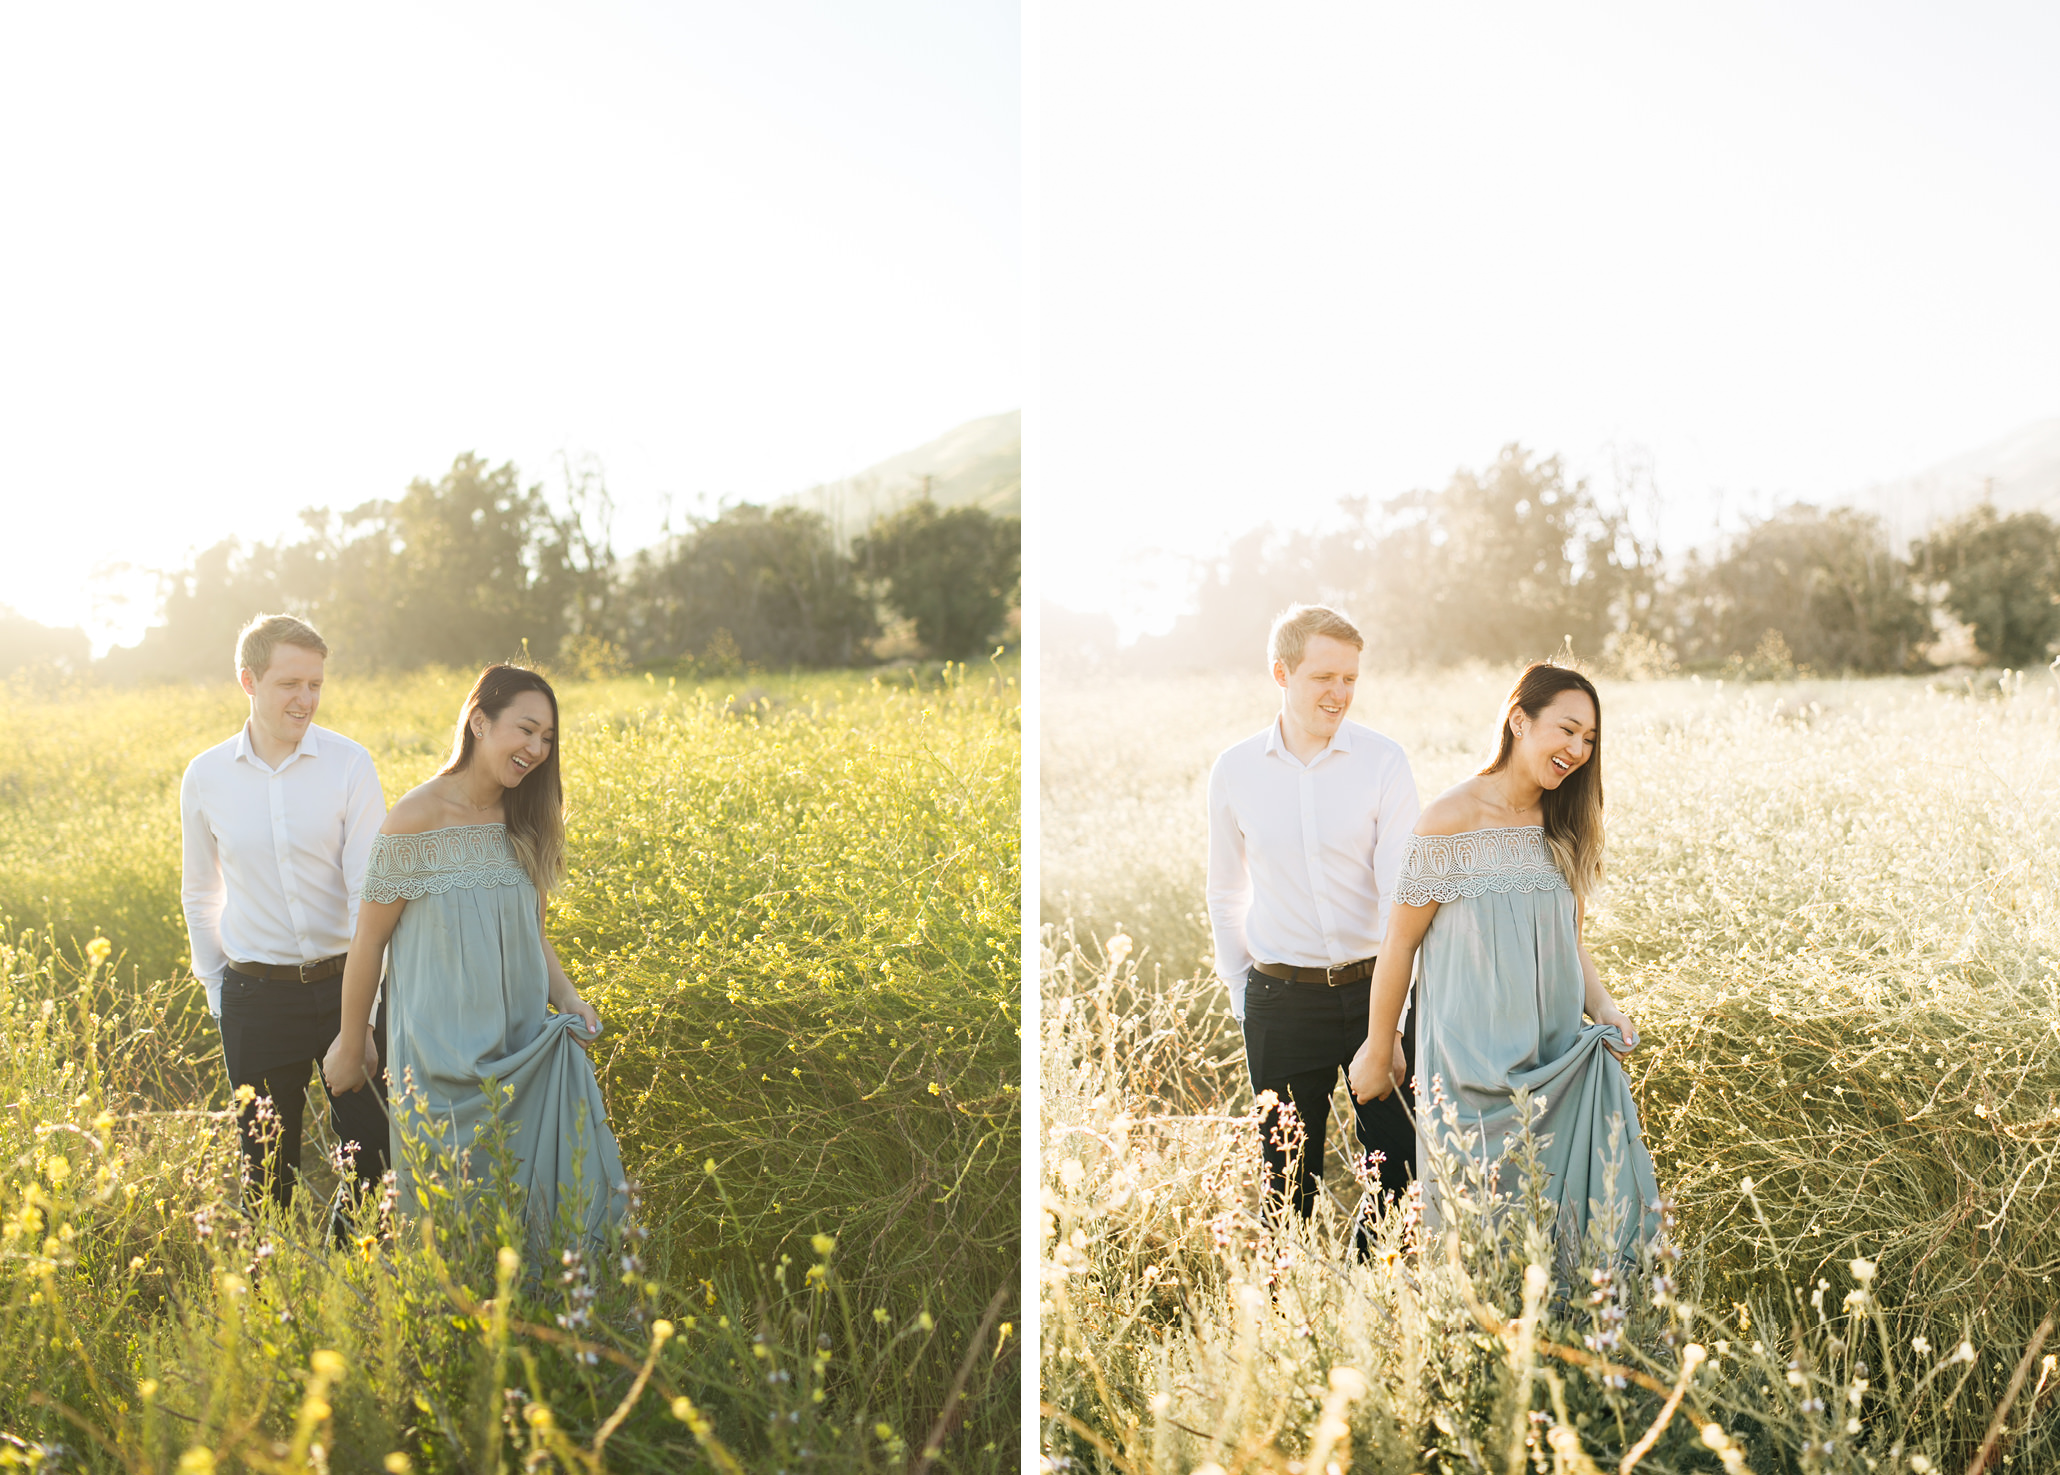
Did you notice any common lighting situations in the above images? Pay attention to where the light source is coming from and how the position of the light (whether it be the sun, an off camera flash, sparklers, or ceiling lights) is affecting the look of the photo.
One of the most frequently asked questions that I get is how to keep your style consistent when shooting at different times of the day in different locations. And while it’s not always easy to do, I will say that I seek out very specific lighting, which helps to create my classic light and bright aesthetic as a wedding photographer. For portrait sessions it’s much easier to control your lighting because you can pick the time of day and location that you know will work. A wedding is much more challenging. It has taken me years to understand what kinds of lighting to look for on a wedding day and why. But when I break things down I like of lighting like this…
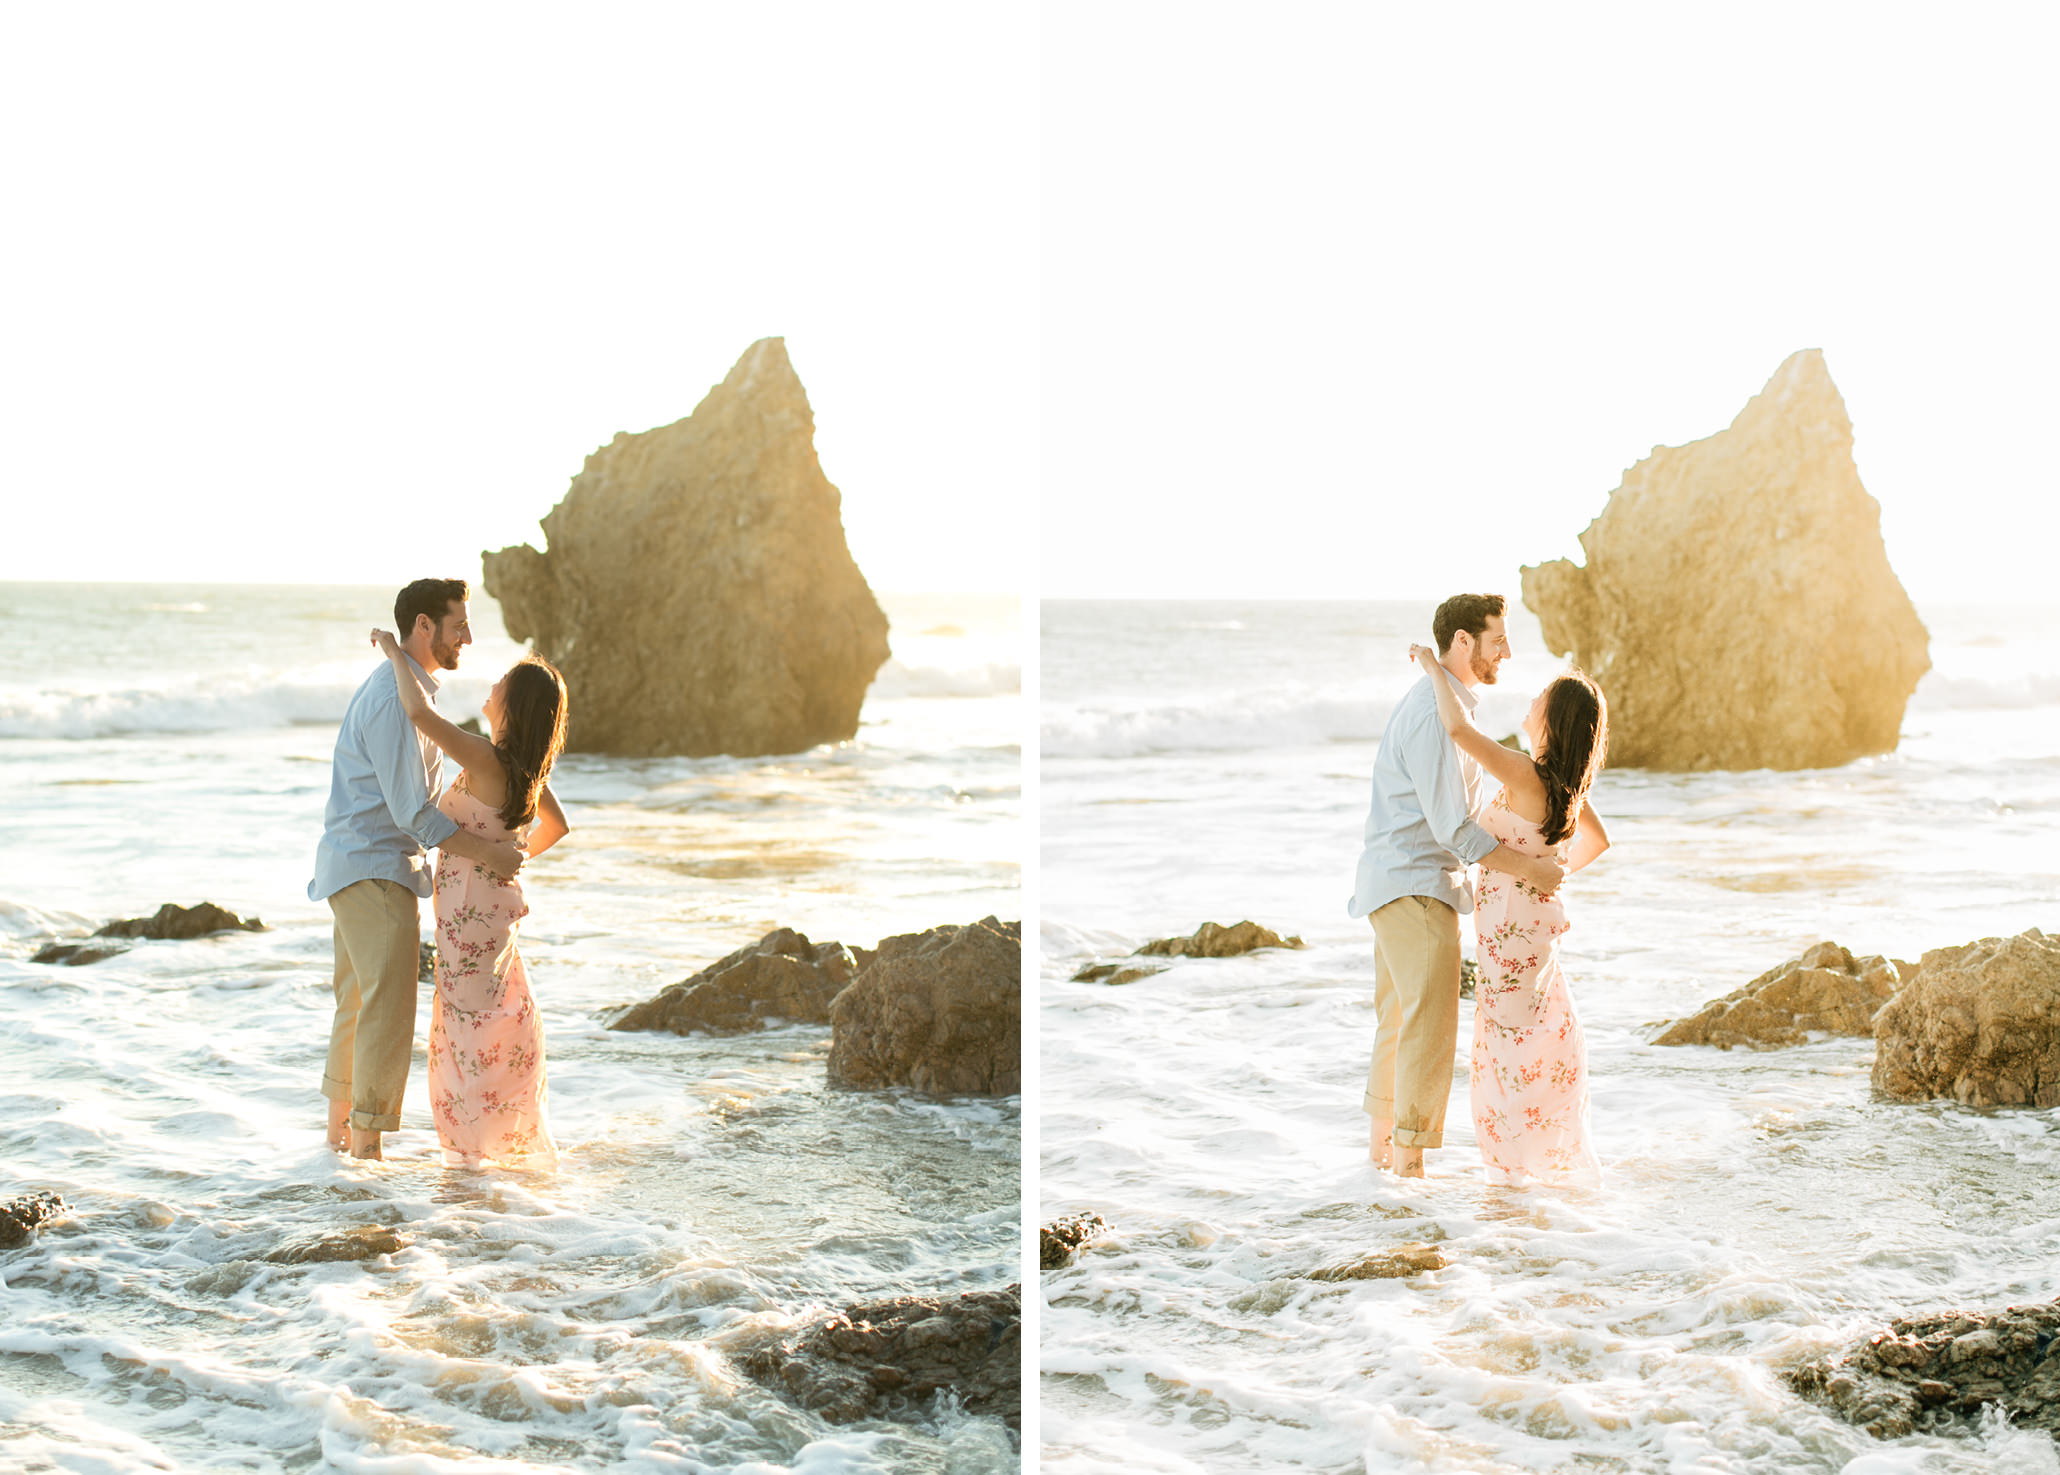
My preferred style is back lit, which means the sun is behind my subjects either directly or slightly off to one side. When the light source is behind the subject it creates somewhat of a glow around them and that is when you get that true light and airy feel. I also always welcome open shade if back lighting simply isn’t an option. By open shade I’m referring to a large area that is evenly shaded. Shade is a much safer choice and can really be a lifesaver if you find yourself shooting in the middle of the day. I almost never shoot with direct sun on my subjects’ faces not because I can’t, but because I find that it’s too harsh and colors are very different in direct sun. Window light and alternative light sources can work wonderfully with the light and airy feel if there is enough of it. Both of these options also lend themselves to very dark and moody vibes, but ultimately it’s how you use the light.
And I can’t talk about lighting without mentioning sun flare (also known as lens flare), a personal favorite of mine. Sun flare happens when sunlight hits the sensor of your camera through your lens just as you click the shutter and creates a golden glow or a colorful ring in a photograph. It’s amazing how you can pivot ever so slightly to get sun flare or to avoid it. I wouldn’t recommend shooting an entire session with sun flare in your photos, but a few images with the correct amount of flare can be exciting, artistic, and a little fun!
So next time you are at a session or admiring a fellow photographer’s work and wonder how they created that image, notice the lighting and where the light source is coming from. You will learn so much by doing that!
MORE QUESTIONS?
Thank you for all of your continued interest in my work and how I create it! If anyone has any further questions please comment below or send me an email – I love hearing from you guys.